That logo, that pet photo, that simple doodle—you can see it perfectly stitched on a bag, a hat, or a jacket. But how do you bridge the gap between that digital image on your screen and a physical embroidery pattern your machine can read? The process, called digitizing, can seem like a dark art reserved for professionals. But with the right approach, anyone can learn the basics. This guide will walk you through the entire journey, demystifying each step to show you exactly how to convert image to embroidery pattern and unlock a new world of creative possibilities.
Think of this as your friendly roadmap. We won't just tell you to "use software"; we'll show you how to prepare, what decisions to make, and how to avoid the common pitfalls that frustrate beginners. Let's transform your image into a stitchable reality.
Step 1: The Foundation - Choosing the Perfect Image
Your entire project's success hinges on this first step. Not all images are created equal for embroidery. Choosing a complex, detailed photo will lead to frustration, while a simple, bold graphic will set you up for success.
What to Look For in a Great Starter Image:
-
Simplicity is Key: Look for graphics with clear, distinct shapes and minimal tiny details.
-
Strong Contrast: The subject should stand out starkly from the background. Think of a silhouette.
-
Limited Colors: Start with an image that has one to three colors. Every additional color adds complexity with thread changes.
-
No Small Text: Tiny text is one of the hardest things to embroider cleanly. Save it for later projects.
Perfect Examples for Your First Project:
-
A company logo without intricate text.
-
A basic shape like a star, heart, or a simple flower.
-
A bold animal silhouette (a cat, a dog, a bird).
-
A classic icon or symbol.
Step 2: Image Prep - Cleaning Up Your Graphic
Before you even open your digitizing software, a little prep work on your image will make the process infinitely smoother. Your goal is to create a clean, high-contrast version of your design.
-
Crop and Isolate: Use any basic image editor (like Microsoft Paint, Canva, or GIMP) to crop your image, removing any unnecessary background elements.
-
Increase Contrast: Boost the contrast and brightness sliders to make the foreground "pop" and eliminate any gray, fuzzy areas.
-
Convert to Black and White: For the cleanest result, convert your image to a pure black and white, 1-bit image. This removes all shades of gray, leaving you with a crisp, clear outline to work with. This single step is a game-changer for beginners.
Step 3: Choosing Your Digitizing Tool
You have several options for digitizing, each with its own pros and cons.
Option A: Auto-Digitizing Websites or Software (The Quick Start)
These platforms promise a one-click solution. You upload your image, select your format, and download a file.
-
Pros: Incredibly fast, no technical knowledge needed, often free or low-cost for simple designs.
-
Cons: You get what you get. The computer makes all the decisions, often resulting in excessive stitches, poor pathing, and a lack of refinement. Quality can be low.
Option B: Dedicated Digitizing Software (The Professional's Choice)
Programs like Hatch, Wilcom, and Brother's BES series are built for this. They offer manual control over every stitch.
-
Pros: Maximum control, high-quality results, ability to edit and fine-tune.
-
Cons: Expensive, has a significant learning curve.
Option C: The Free & Powerful Combo - Ink/Stitch (The Hobbyist's Dream)
For this guide, we'll focus on the principles behind manual digitizing, which are best learned with a tool like Ink/Stitch. It's a free, open-source extension for the free vector program Inkscape. It has a learning curve but teaches you the true craft without any cost.
Step 4: The Core Digitizing Process - Your Step-by-Step Walkthrough
Now, let's open your software and get to work. These steps outline the universal process of manual digitizing.
1. Import and Trace Your Image
Start by importing your cleaned-up, black-and-white image into your software. In a program like Ink/Stitch, you'll use the "Trace Bitmap" function to create a vector path around your image. This vector outline is what the software uses to generate stitches. Adjust the settings until you get a clean outline that perfectly matches your original design.
2. Assign Stitch Types - The Heart of the Process
This is where you move from a flat image to a textured stitch plan. You will assign different types of stitches to different parts of your design. For your first project, you primarily need two:
-
Satin Stitch: This creates a smooth, shiny, rope-like effect. Use this for outlines, borders, and lettering. The stitches zig-zag back and forth to cover a column.
-
Fill Stitch: This is used for larger areas. The stitches run in a back-and-forth pattern to cover a broad space, like coloring with a marker. Use this for the main body of your design.
3. Define the Stitch Direction
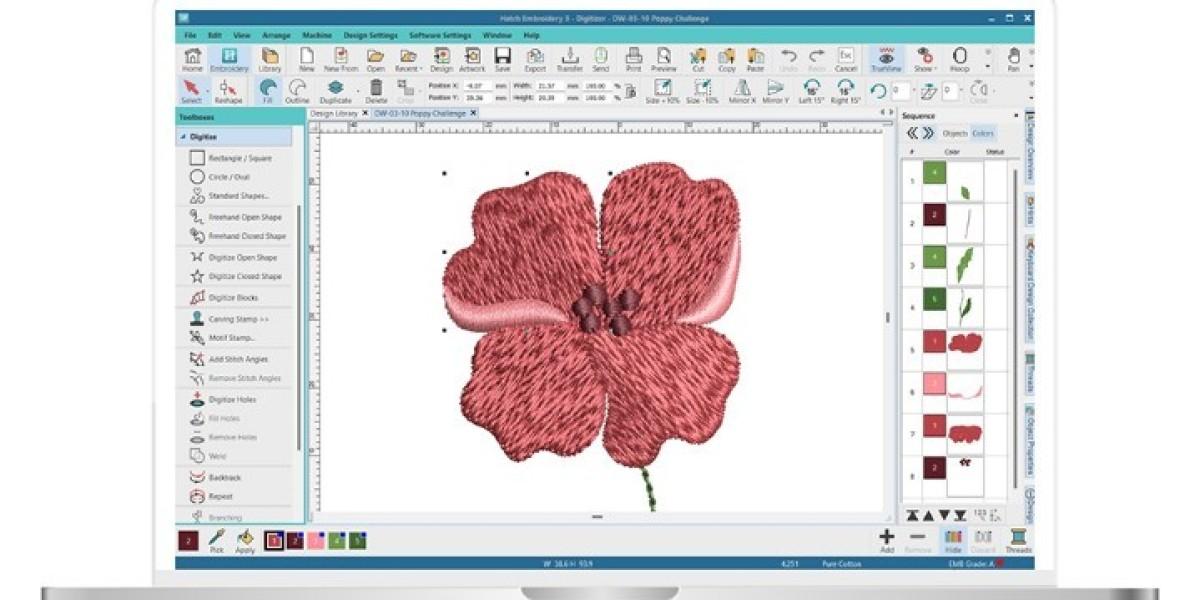
You can control the angle of the fill stitches. Changing the direction for different sections adds visual interest and strength. For a simple shape, a 45-degree or 90-degree angle is a great starting point. For example, changing the stitch direction in different petals of a flower can make them appear separate and more defined.
4. Build the Foundation with Underlay
This is the secret sauce of professional-looking embroidery. Underlay is a foundation layer of stitches that goes down before the top stitches. Its job is to:
-
Stabilize the fabric and prevent puckering.
-
Provide a firm base for the top stitches to lie on, creating a smoother surface.
-
Push the fabric up for a slightly 3D effect.
Most software has auto-underlay functions. For a first project, using a simple "edge run" or "center walk" underlay is a perfect and effective start.
5. Establish the Stitch Sequence and Trims
The software needs to know what order to stitch the elements. A good rule is to stitch from the center outward and from the background to the foreground. This means elements that should appear on top are physically stitched last. The software will automatically add trim commands when you change colors, but you can manually add them to control the path of the needle.
Step 5: The Non-Negotiable Test Stitch
You should never stitch your final project with a brand new, untested digitized file. A test run is your quality control.
-
Use Scrap Fabric: Hoop a piece of scrap fabric that is similar to your final project fabric.
-
Use Stabilizer: Always use the appropriate stabilizer hooped or placed beneath your fabric. This is critical for preventing puckering!
-
Watch and Learn: As the machine stitches, watch carefully. Take notes. Does the design look how you imagined? Are there any thread breaks or birds' nests? Does the fabric pucker?
Step 6: Analyze and Adjust - The Feedback Loop
Your test stitch is your best teacher. Here’s what to look for and how to fix it in your software:
-
Puckering (Fabric Gathering): The design has too much pull. Solution: Reduce the stitch density in your fill areas or add more underlay.
-
Gaping (Spaces Between Stitches): The stitches are too far apart. Solution: Increase the stitch density.
-
Design Looks Distorted: The push and pull of the thread warped the shape. Solution: Use push/pull compensation settings in your software to pre-emptively counter this distortion.
Conclusion: Your Journey from Pixel to Stitch Begins
Completing your first digitizing project is a massive achievement. You've taken a digital idea and, through a series of deliberate steps, turned it into a tangible, stitched reality. It may not be perfect, and that's more than okay. Every expert started with a first project.
The goal here is not perfection but progress. You now understand the critical importance of image selection, the basics of stitch types, and the non-negotiable role of a test stitch. This knowledge is the foundation. Each design you digitize will teach you something new and build your confidence. So, choose a simple image, open your software, and take that first step. The rewarding feeling of seeing your own digitized design come to life under the needle is worth every minute of the learning process.